Black Ops 2 Mob of the Dead All Guns
Shinzuu is an ex-pilot and hardcore gamer. Video games have been the most influential cause of their current skill set and abilities.
Not All Doors Are Meant to Open
During your endeavors throughout Alcatraz, you'll notice there are a lot of doors in this map. However, there are several doors that should not be opened. The reason these doors should not be opened is because they will negatively affect your ability to play for rounds, or even just playing in general.
- Side Cell door next to the Cell Block Dog: The other side of the cell is high traffic for players. By opening this door, you'll end up trapping players that are forced to run by here.
- The only points-door in the Infirmary. While this can save you money when trying to make your way to the gondola, it will screw you and other players over with an extra wave of zombies from the side.
- Power room door at the Docks (right next to the dog on the Docks). The portion of the Docks by the dog is one of the best places to run a train of zombies. By opening this door, you will end up eliminating this Training area since it will double the zombie traffic.
- Cage Door next to Juggernogg. The hallway behind the doors, opposite of Jugg, is another great training area. This hallway has a very wide wall-span, and is curved enough that you can easily run circles around those brainless goons. Opening the cage doors will eliminate this great long-running area.
- Afterlife Door to the Showers from in front of the Cafeteria. The shower is not only the best area to run Trains of Zombies, but it is also the best place to cover players who died in the previous round and/or is short on points. When you open the Cafeteria-Shower Door, it blocks a section of the showers, and no longer allows any players to even camp in there, let alone survive long rounds by running trains. (To go into the Showers, pay the 2,000 points for the door across from the Hell's Retriever.)
There you are. If you leave these doors closed, you'll survive longer, and recover from any rounds that you died/downed from.
"Retrieve" Your Greatest Asset Fast
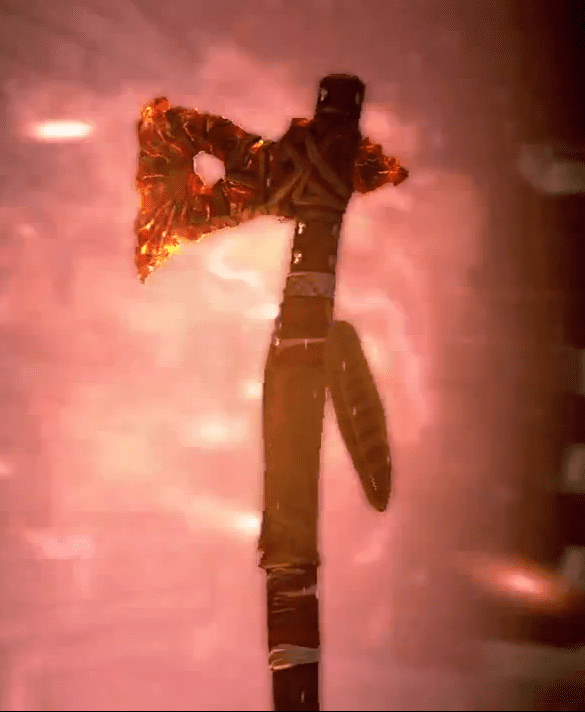
First and foremost, like Origins, you're going to want to monopolize on points, and get the most important things done soon. In the case of Mob of the Dead, we're talking about the Hell's Retriever tomahawk. This puppy is not only going to be your ace-in-the-hole, it's also going to be the pinnacle of everything you'll be doing on this map, including surviving high rounds and the Easter Egg.
Before playing this map, make sure you have three or four players if you're going to play for rounds. While you can do this with two players, it takes much longer to get everything.
Right off the bat, you and everyone are going to want to earn plenty of points, and it's best to use the standard Point Whore strategy for the first two rounds, with the addition of 1 step, which I will now share.
Round 1 : As you all know, you start the game in Afterlife. Use this time to shock the door to the Double Points open, but do not get the Double Points this round. To start this game, be sure to allow all zombies to come through the barriers and ONLY knife them. This will give you 130 points per kill, but it will also allow you to save ammunition for more points in Round 2, and increase the likeliness of a bonus dropping. (Unlike other maps, the chances of getting a Max Ammo in the first two rounds is only 1/1,000.)
Round 2 : In this round, wait until the zombies start tearing down the barriers before grabbing the Double Points bonus. This will ensure maximum usage of the time you have for it to maximize your points. In this round, each zombie takes a clip from your M1911 in the chest and one knife. Combined with the Double Points, this will ensure 420 points per kill. At the end of the round, the one with the most points opens the door out of spawn, in which you will break off into two teams. Team One will consist of the most versatile player who can survive with just the M14 for the next few rounds. This team will head straight for the cafeteria (brown door) and go upstairs to the dog next to the Pressure Gauge part in the infirmary. The other 2 or 3 players (depending on how many players you have) will head to the dog in the center of the complex, right outside of spawn on the 2nd floor (outside the cell door).
Round 3: Both teams will kill zombies in front of these dogs in order to feed them. The reason you need one player in the infirmary and 2-3 in the cells is because you need to be able to only kill 1 zombie at a time. After each time a dog eats a zombie, it will not consume another one until it swallows the whole thing and starts barking again.
Round 4 : By now, the cell block dog should be fully fed its 6 zombies and Team Two should be on the docks (travel via the gondola on the 3rd floor). One player in Team Two will have the 2,000 points to open the 3rd floor cell door, and another should have the Afterlife to use to turn on the gondola. Team 2 will then take the gondola straight down to the docks, where the 3rd and final dog is. If done well, the third dog should have been fed before the end of the round. Plus, it'll be a good idea to turn on Juggernogg.
At the beginning of this round, or at the end of Round 3, the Infirmary Dog will have been fed, in which case, that single player will be going into Afterlife and opening the roof and turning on Deadshot Daquari.
While Team 2 takes care of the 3rd dog, the solo Team 1 will make kills and open up doors in the main complex. Team 1 will open the cell passage in front of the cafeteria (that heads towards the Warden's office), the Warden's Office (done in Afterlife) and the door at the bottom of the Warden's Office stairs (2,500 points total). Do not open the side cell door on the 2nd floor that's right next to the cell block dog, as it will end up trapping players running near there in the long run.
Round 5-7 : By this time, all players will have the Hell's Retriever and you all will have at least 3 plane parts. Kills zombies, survive, get at least Jugg and get the rest of the plane parts. You should be on your way to the bridge from the roof by round 7.
"Redeem" Your Greatest Asset
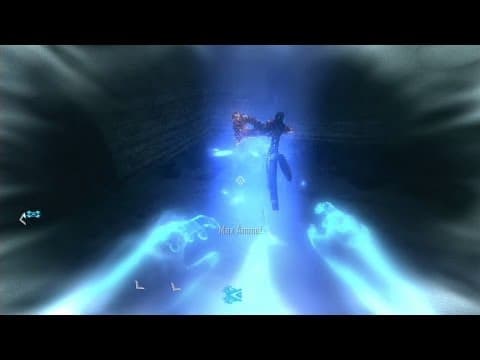
Upon your first visit to the Bridge, your goal should now be to upgrade your Hell's Retriever to the Hell's Redeemer. This should be happening between round 7-10. While flying to the Bridge, make sure you take note on how many kill you have prior to actually landing on it. During your first time on the Bridge, do not shoot your gun(s), and only use your Retrievers. Make sure each player gets at least 50 kills with their Retrievers without shooting. This shouldn't take more than 2 rounds, even if you made it there in Round 7.
You'll know you personally has had enough kills, you'll hear a very loud hissing noise at the end of the round (it sounds like air releasing out of a Helium tank). After you get that sound (and make sure it's really loud. if it's not loud, it was someone else who earned it. and ignore any sounds you hear during a round), you can head back to Alcatraz via the Electric Chairs at the end of the bridge.
WARNING: You can ONLY return after the end of a round. If you leave before the end of the round, you won't be able to upgrade the Hell's Retriever, and will have to come back to the Bridge and try again.
Once you're back in Alcatraz, you want to throw your Retriever into the lava pit that's found underneath the Cell Block dog (If it doesn't go in, you either missed or you didn't get enough kills, or shot, on the Bridge). Your next step is to just survive the rest of the round. During the round after you threw in your Retriever into the lava pit, go into Afterlife near where you get the Retriever, and pick up your new Hell's Redeemer.
Unlike the Retriever, the Hell's Redeemer can charge 3 levels instead of 2, and (when fully charged) can be a 1-hit wonder through Round 50.
Read More From Levelskip
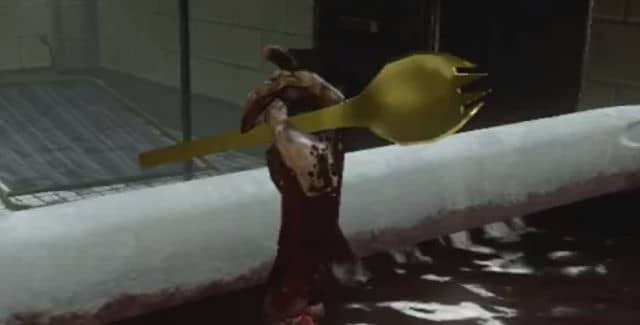
The Golden Spork
You can't start this without having gone to the Bridge at least once. In fact, you can start this right after your first trip. Before throwing your Retriever into the lava pit, throw it at the poster in the back of the 3rd cell from the Warden's Office.
Next, you go into Afterlife and go into an opening that now appears in front of the Warden's Office, and you zap the spoon on the ground to the right of the hole in the floor. You'll know you've zapped it when you hear Samantha's familiar laugh.
The following three steps only requires one person to do:
- In the "window" at the back of the cafeteria, throw your Retriever/Redeemer at the table on the left inside the barrier. You'll hear the Warden yelling at you.
- Next, take this plain spoon and go up to the Infirmary. Once upstairs, go down the right side, not the left, and hold square (or X for 360 players) at the last tub that's in front of where the Mystery Box would be (or is) until your spoon fully stirs and sinks into the tub of blood.
- Finally, in the Showers, get kills with the Acid Gat (Vitriolic Withering). Once you've gotten enough kills, you'll hear Samantha laughing once again.
The final step is simple. Go back to the tub your stirred your spoon in and hold Square (or X) and the spoon will rise out in a skeletal hand. Then press once more to pick it up. For other players, you just have to grab the spoon from the table, stir it into the tub, and then just press again to pick it up (the killing portion only has to be done once).
This Golden Spork will last you as a one-hit wonder through the end of Round 30.
How's The Gat?
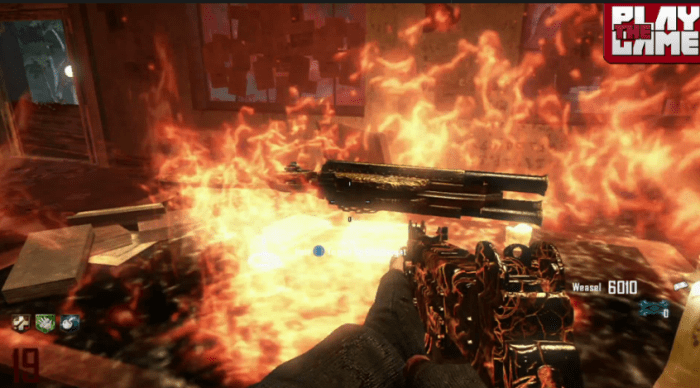
A Second Gat
As many of you may or may not know, you can actually get a 2nd Blunder Gat in this game. By collecting five different blue skulls, you can gain a Blunder Gat without having to spend points on the Mystery Box. I will label where you find these five skulls.
- Lit cell just outside of spawn. Top shelf.
- On the roof: Go down the left side and look off the side before you get to the corner. You'll see a corner of the building sticking out. Throw your tomahawk at the corner of the small ledge to get this skull.
- Light pole in front of Juggernogg. Stand against the corner next to the barrier wall in front of Jugg, look up, and jump just before throwing.
- On the Dock at the base of the sniper tower. Across the water, you'll see another dock. Throw your tomahawk at the third pillar from the left.
- The final skull is at the top of the electric pole outside the window in the Warden's Office right next to Speed Cola. (It's best to get this last so someone doesn't steal the Gat from you.)
The free Blunder Gat will be found on the desk inside the Warden's Office.
WARNING : Do NOT grab the skulls until AFTER someone has gotten the Blunder Gat from the Mystery Box. If you grab the free Gat before someone gets it from the Mystery Box, they won't be able to get it until you die. Not only will having 2 Gats help you all survive longer, this will prevent pissing off your teammates. A LOT of people have no issues ditching you (quit) for not allowing a 2nd person to have a Gat.
www.gdunlimited.net
"Exercise Yards"
In this map, there are exactly five places that can run proper Trains of zombies for any average and below skill levels. There is a 5th, 6th and 7th place, but it requires a significant amount of skill.
- The first is right in the Showers. As long as the Afterlife door upstairs remains closed, this spot is arguably the easiest spot to run Trains. On top of that, the Laundry Cage is a great place for players to hole up and get protected that have no perks/ammo or have died the previous round.
- Next is a close second in difficulty, right behind the gated door next to Juggernogg (accessed by going through the Spiral Staircase). As long as the gate is not opened, you have a moderate to low, but steady, flow of zombies coming from one end of this hallway. With the gate closed, wide walls and a wide curve of the hall, you will have no trouble surviving in this spacious path.
- This third spot is around the dog found on the Docks. The path from the Tommy Gun to the Construction Bench is perfectly set with boxes and a steady, heavy to moderate traffic of zombies. The shipment crates allow better funneling of zombies, lowering the difficulty greatly, as long as the door between the dog and the Construction Table remains closed.
- This spot, everyone knows about. The Cafeteria. Fairly simple, and you just run your circle around the little square. Aside from the windows on each of the three walls in this room, the only other way in is a large hallway from the main Cell Block, which is a large trap. If your team dies on you or if you're being chased into the cafeteria by a lot of zombies, a cool 1,000 points will start the shower of acid that runs for a good 30 seconds, killing ALL zombies (including the Warden if you can trap him in there). However, be warned, it downs players, too.
- Though there is a huge number of zombie spawns in it, the Bridge is a fairly easy place to run a Train. However, there are a lot of drawbacks to being here. First, after you kill the first Warden, there will no longer be any bonus drops anywhere as long as there is at least one person remaining on the Bridge. Also, there are no wall weapons available here.
So here are the other two spots you can go to if you think your skill level has gone high enough.
- This first one is a bit of a doozy, but the easier of the two. Believe it or not, you can run a decent train within the Warden's Office. The space is slightly confined and has 3 windows plus the entrance, but it's not impossible. The entrance has a 1,000 point trap, the dicing twin fans, that will kill most zombies that come through (the only ones that get through this trap are crawlers).
- This one requires good reflex and some skill and good judgment calls. The 3rd floor of the central Cell Block utilizes 50% of the complex as an emergency run. As long as the traffic remains moderate or lower, it won't be too hard to run a train just on the 3rd floor alone. However, when traffic picks up, you're going to want to either take the Gondola to the Docks, or you can jump off to the Warden's Office Hallway, run straight around through to spawn via the 2nd floor, and then come back around up the stairs to the 3rd floor. As long as all the proper doors are closed, the chances of getting trapped are next to Zero.
- The roof is the most popular for high rollers, and is usually pretty deceptive for new players. This place always requires 2 players if you're going to try to run a train. It is impossible on one's own. While there are no windows, and has units that helps funneling zombies like the shipment crates on the docks, there are 9 spawns along the edge of the roof, and 1/2 the spawns in the Infirmary come up the stairs to get you. Also, when you pass under the launch ramp, the passage is very narrow, and you'll get trapped in a heartbeat if you're not careful.
There you have it, guys. These are the best places to be running your trains. There have been arguments about the Spiral Staircase being a good place to run a train, but that is no true. The Spiral Staircase has far too many spawns in it, and exceptionally high traffic. While it is fairly safe at the beginning of the game, it is no longer stable or even remotely safe after you open the bottom door (which you will need to do if you ever plan on building the shield and getting plane parts).
www.charlieintel.com
Happy Death Box
The Mystery Box here at Alcatraz has wonderful new weapons, and not just the Wonder Weapon, the Blunder Gat. You can enjoy a great number of exclusive weapons (or at least different from the Green Run maps) here.
- PDW-57 (The Predictive Death Wish 57000): Yes, everyone's favourite point-stacking wall weapon from Die Rise and Buried is found here in this box. The only difference it has with its wall counter-part is that you can't buy ammunition for it.
- AK-47 (Reznov's Revenge): We finally got another AR that pales the Galil's performance. Exceptionally high damage and ridiculously high accuracy, the AK-47 does the original one from Black Ops 1 some serious justice.
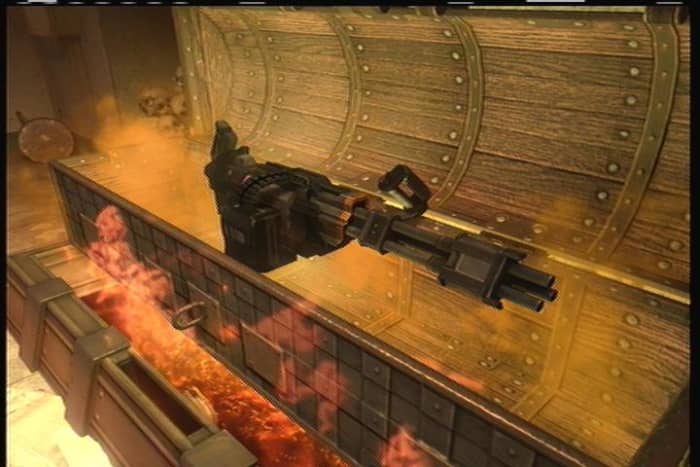
- Death Machine (Meat Grinder): Yes, Treyarch has allowed us to have the Death Machine as an actual weapon, and it kicks some serious zombie butt. While it really slows down your movements (and a slow reload time), the damage and fire rate (not to mention the clip size) is nothing to laugh at. This sucker carries 150 rounds per clip and has 300 in reserve. When upgraded to the Meat Grinder, this beastly weapon has 550 rounds and 550 in reserve. Much to its name, it will turn any zombies into ground meat.
The Haunting
As you all know, while in Afterlife (whether because of a zombie/warden attack or from using the electric box), you have a time limit to revive your body before you are considered down. Well, there's a strategy that can help you Haunt the halls (and pretty much all of) Alcatraz. By having a person stand at your body and constantly partially reviving you (as in they revive, but let go of the revive button before the meter fills up), you can do what's called a "Haunting" and stay in Afterlife for an extremely long amount of time. This is particularly helpful when doing the Easter Egg, or turning on a lot of machines/getting parts, allowing you to only use 1 Afterlife for everything, instead of many. (You can lower the Steel Cables, fry the power breakers for the A/C unit cage in the Warden's Office, open the Warden's Office, turn on Speed Cola and Double Tap in one go.)
For the Campers
Okay, let's face it, some people just need a place to sit, especially if you just died last round, or you just recovered from downing, and can't afford to move around too much without perks. there are 4 places in Mob of the Dead in which you can hide. Granted, like any other map, this will not take you too far in the rounds, except for one spot, with the help of another player.
- This first spot is the steel wiring cage at the bottom of the Spiral Staircase. This spot is very long and narrow, and perfectly bottle-necks zombies coming in.
- The second spot is on the gondola. While sitting in the gondola on the 3rd floor of the complex, you can easily shoot all the zombies coming at you from inside the building. However, be careful as some may drop off the edge of the roof right in front of you. If you can't handle it, quickly pay the 750 to move the gondola and get out of harm's way.
- This spot is the best, and that's in the Laundry Cage in the Showers. While a separate player is running a Train in the Showers, less than 10% of the zombies will be going for you, and even less than 5% if you're huddled in the corner between the Washer and the wall. The biggest problem(s) is going to be the zombies coming in from the window just outside of the Cage. Be sure you have plenty of claymore on the floor as backup.
- This final spot is located on the roof. If someone is planning on running a train, you will need to stay by the stairs to watch their back while they watch yours. The Roof is not purely a Training area, or a Camping area. It is a hybrid spot that requires a minimal party of 2 to be able to hold down. While you will do a little bit of moving, it's pretty much a camping spot as you won't be moving more than 10 feet.
Popping The Weasyl
As most of you know, there is an Easter Egg in this game called Pop Goes The Weasyl that allows you to actually end the game. Like Origins, you do NOT need a full party to do it, but you have to have a minimum of 2 players. If you've done everything that I've pointed out for this map (including the Free Blunder Gat), then you're 90% done! The final steps are not that much harder to follow.
- Visit the Bridge and come back a total of three times during the game (this includes your first time)
- Then, you're going to want to go the Spiral Staircase.
- Here, you'll notice the dial at the bottom is now randomly flashing numbers. Go into Afterlife and enter the following numbers IN ORDER (you might have to do this twice if you don't have someone helping you Haunt): 101, 872, 386, 481
- After this is complete, your screens will turn black and white, and you will start hearing the story of everything that's gone down in the past.
- Keep following the path of Golden Headphones to keep hearing the story unfold.
- After hearing all of the recordings, you'll hear Samantha's laugh, and now you have to fully fuel the plane. (Do NOT fly it yet.)
- In the following round, everyone should go into Afterlife and head straight for the roof and get on the plane.
- Once on the Bridge, everyone must go to their bodies on the electric chairs and revive themselves.
- Next, you'll be warped to one side of the map. This starts an All Against Weasyl deathmatch. Zombies and Wardens will constantly spawn while the players fight it out. Weasyl will NOT be chased by any of the Zombies or Wardens. (Afterlife is no longer active at this point)
- If the Weasyl wins, then the cycle of hatred ends and you'll get the message "The Cycle Ends...". If the Weasyl loses, then "The Cycle Continues..." Either way, the game ends and you'll get the trophy/achievement.
(Please note the following warning: One of the players MUST be the Weasyl in order to even get to the Bridge in Afterlife and finish the Easter Egg.)
Thanks For Reading!
Thank you to all of the dedicated readers, and thank you to my new readers, as well. There will be more guides as time progresses, whether it be for zombies, multiplayer or game strategies. Leave your feedback, and support continual blogs to help you up your game, and show your friends, as well as all those cheating wannabe "players" who think they're something and have nothing to show.
If you'd like to conquer the other maps, here are the links:
- Tips and Tricks
- Die Rise
- Buried
- Origins
Shinzuu Katame (author) from Maine, USA on February 20, 2015:
Yes, I will be
Chris Can on February 20, 2015:
Will you add a hub for advanced warfare zombies?
-Cksmokescreen
Black Ops 2 Mob of the Dead All Guns
Source: https://levelskip.com/first-person-shooters/Black-Ops-2-Zombies-Mob-Of-The-Dead